Cartoon Bus Easy Steps to Draw Cartoon Bus
Public transport is an important part of many people's lives, but there's not much that's fun about it.
Taking the bus to school or work every morning is a great convenience to have, but it's not exactly thrilling.
It can be made a lot more fun, however, and that's what we're aiming to do in this guide on how to draw a cartoon bus!
The steps in this guide will show you how you can create a really fun and interesting portrayal of this useful vehicle. You probably won't see buses as being boring by the end of these 7 steps!
So let's get this creative bus on the road as we take on this step-by-step guide on how to draw a cartoon bus in just 7 fun and easy steps!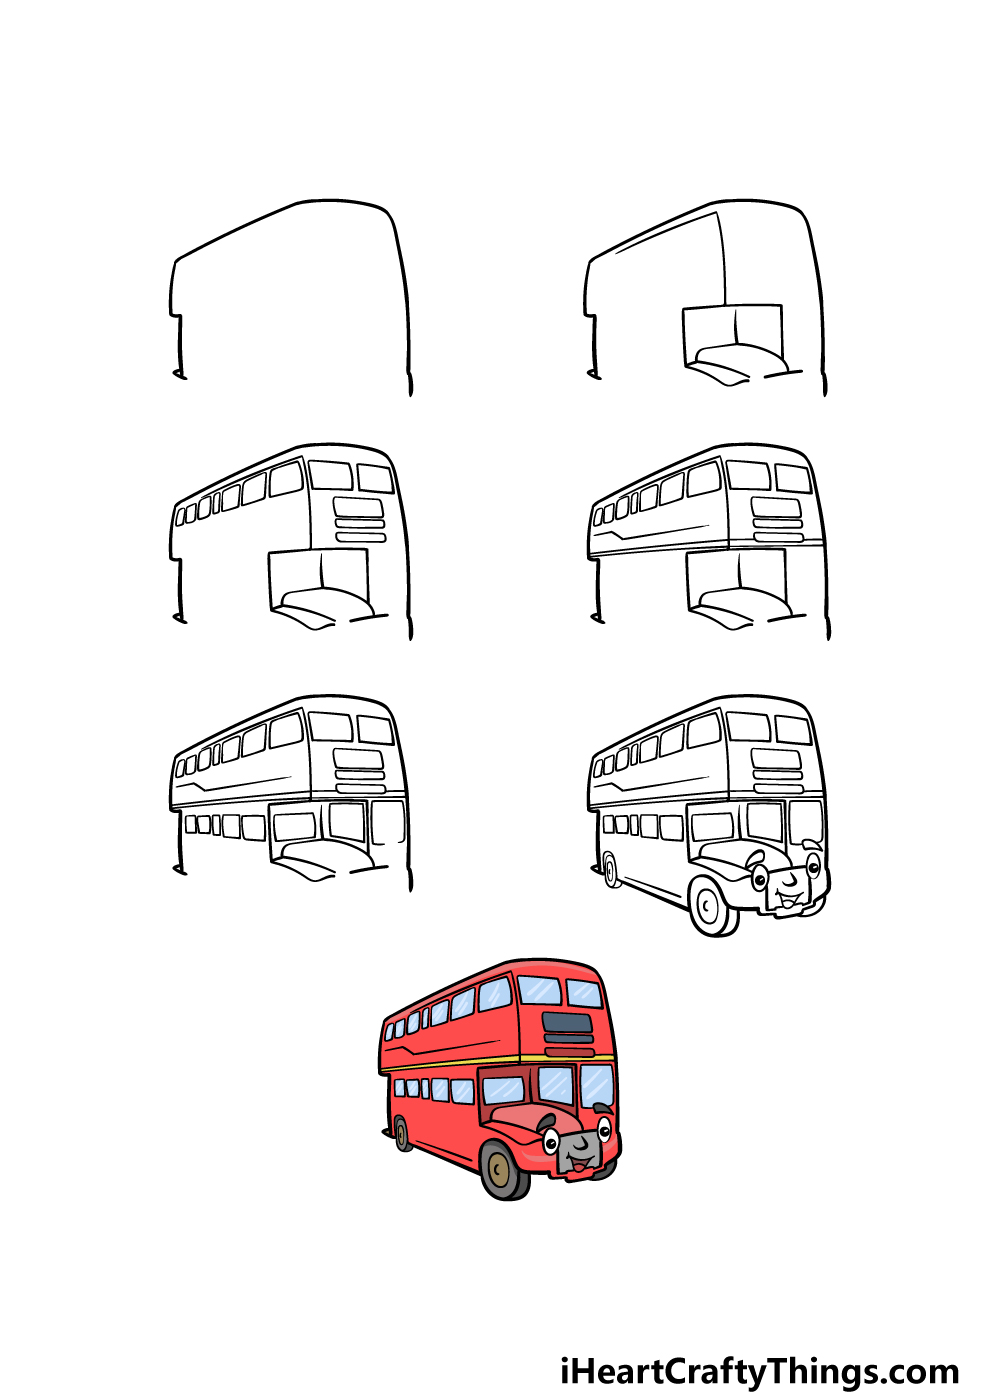
What's in this Blog Post
- How to Draw A Cartoon Bus – Let's get Started!
- Step 1
- Step 2 – Draw some more details for the bus
- Step 3 – Add some windows to the bus
- Step 4 – Now, separate the top and bottom section of the bus
- Step 5 – Draw the windows for the lower sections here
- Step 6 – Now, finish off the final details
- Step 7 – Finish off your cartoon bus drawing with some color
- Your Cartoon Bus Drawing is Complete!
How to Draw A Cartoon Bus – Let's get Started!
Step 1
This guide will begin with an outline for the bus.
Drawing any kind of vehicle can prove a challenge even when done in a cartoony style, but as long as you follow the steps and take your time, it will be much easier!
Try to follow our reference image closely as you draw the squared yet rounded outline of the top, front and back of the bus. We can then add more details and dimensions in the next few steps.
Step 2 – Draw some more details for the bus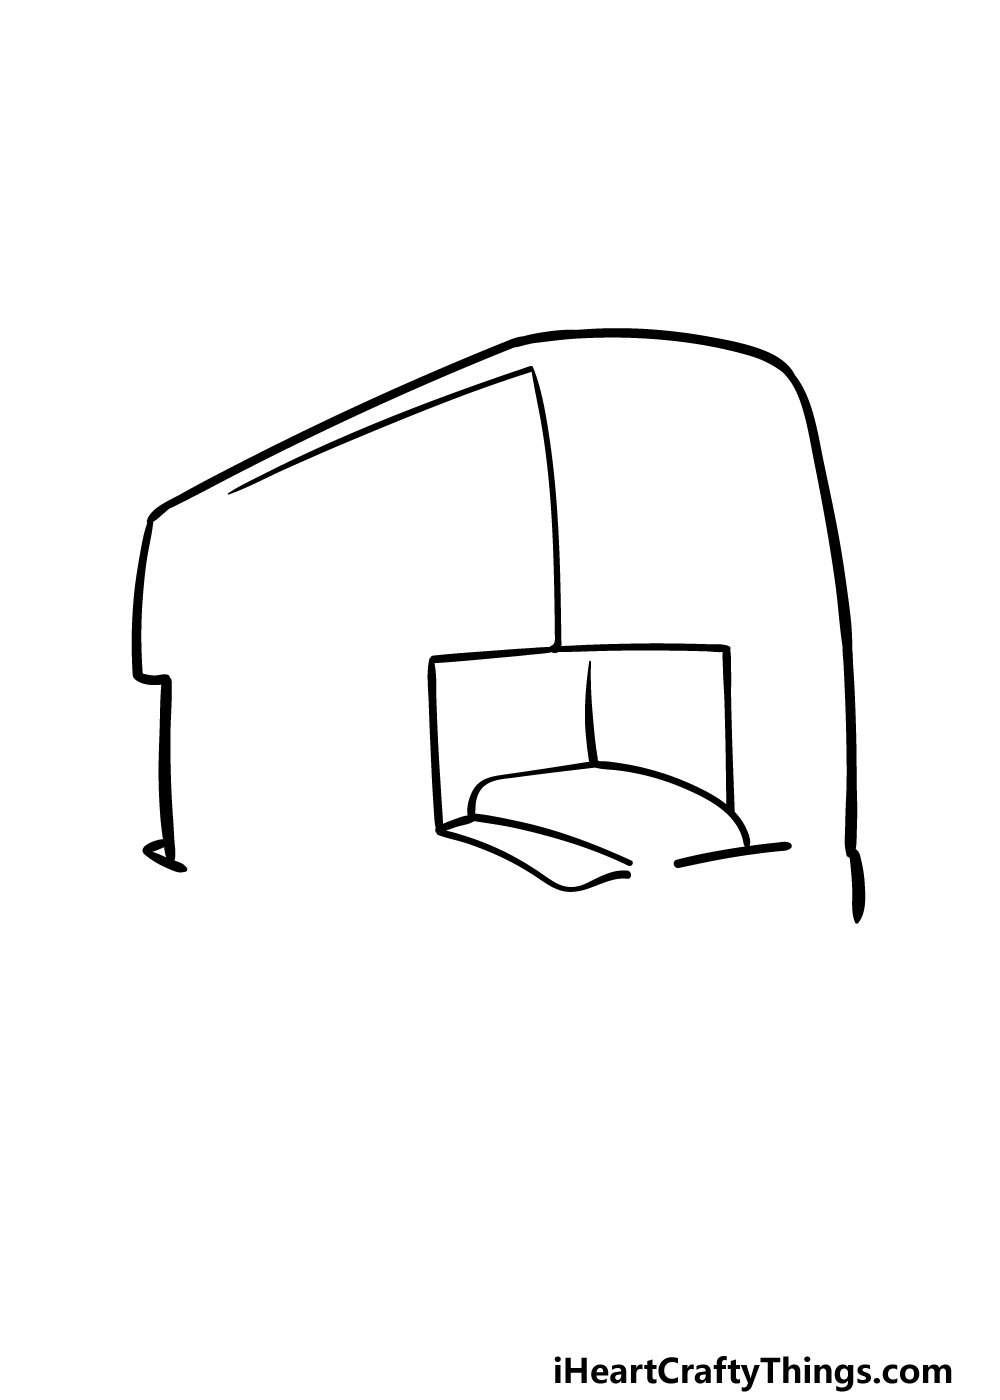
For this second step of our guide on how to draw a cartoon bus, we will be adding some more details to build up the bus structure.
This is another step where following the reference image provided closely will be a big help! First, we will draw a sharply curved line that will look a bit like an upside-down L near the top of the bus.
This will then lead to a squared section that will look like it is extending inside of the bus interior.
This will have quite a few details made up of curved and straight lines, and the reference image will guide you for this section.
That's all for this step, and then we can move on to the next!
Step 3 – Add some windows to the bus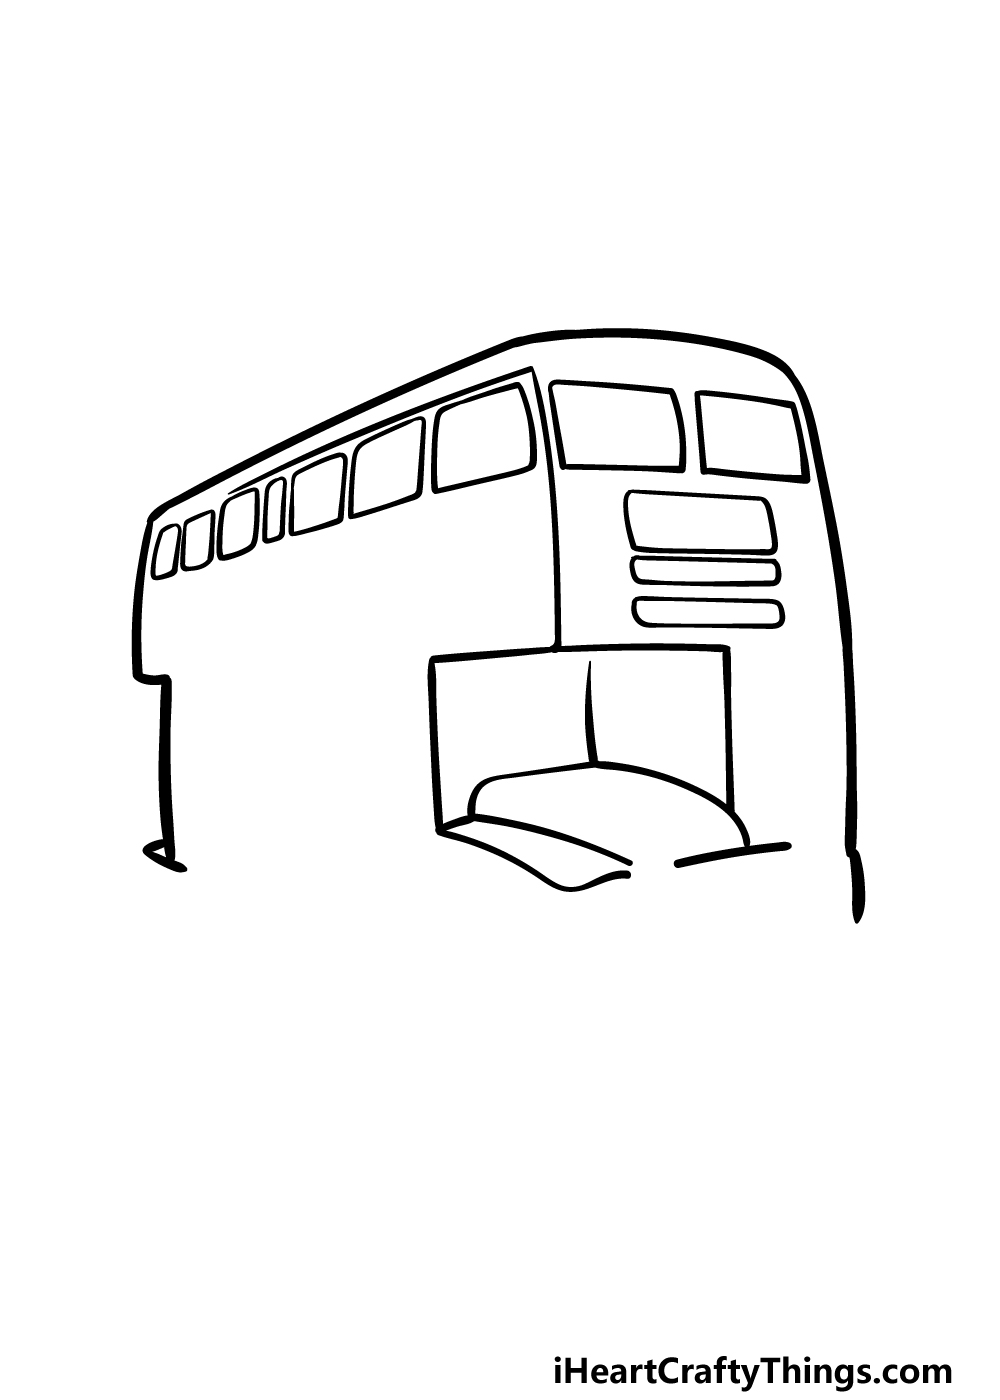
The people riding this bus need some windows to look out of, so let's add some in this next step of your cartoon bus drawing!
These windows will line along the upper edges of the bus for now, and each one will be a slightly rounded rectangle shape.
On the front edge of the bus, there will then be some more rectangle shapes of varying sizes beneath the two windows at the top of this section.
We will then add even more detail in the fourth step of the guide, so let's move on!
Step 4 – Now, separate the top and bottom section of the bus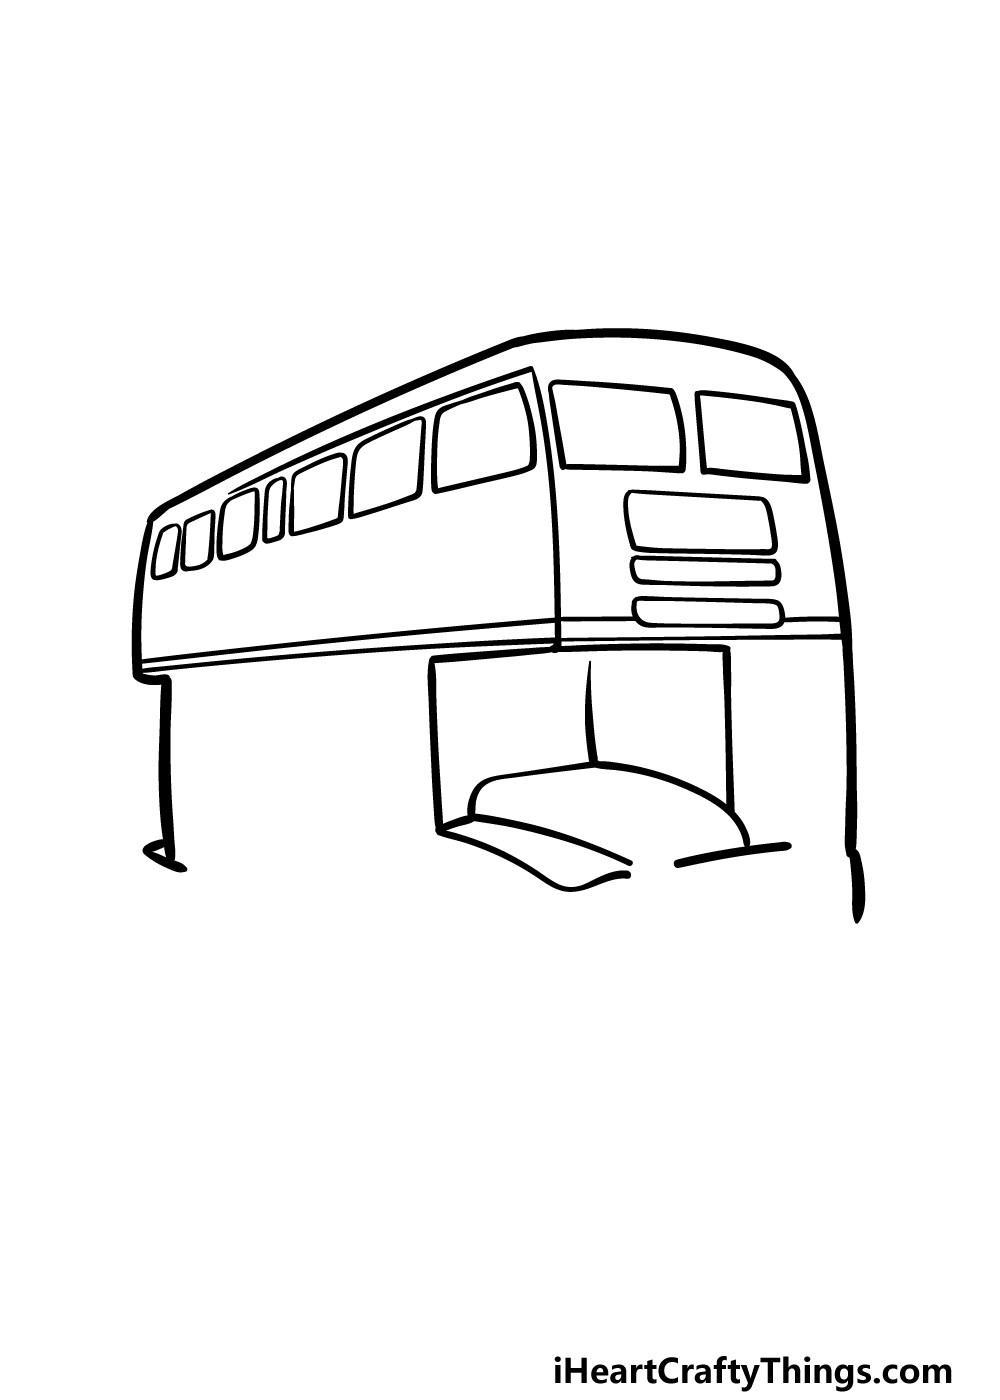
This next step of our guide on how to draw a bus should be rather simple to do, and it will be made much easier if you have a ruler on hand.
We will be separating the top and bottom sections of the bus in this one, and to do this we will use some straight lines that are close to one another.
While not really complex, it would be hard to draw these lines freehand, so that's why a ruler will be helpful here! Once it looks as it does in our reference image, we can move to step 5.
Step 5 – Draw the windows for the lower sections here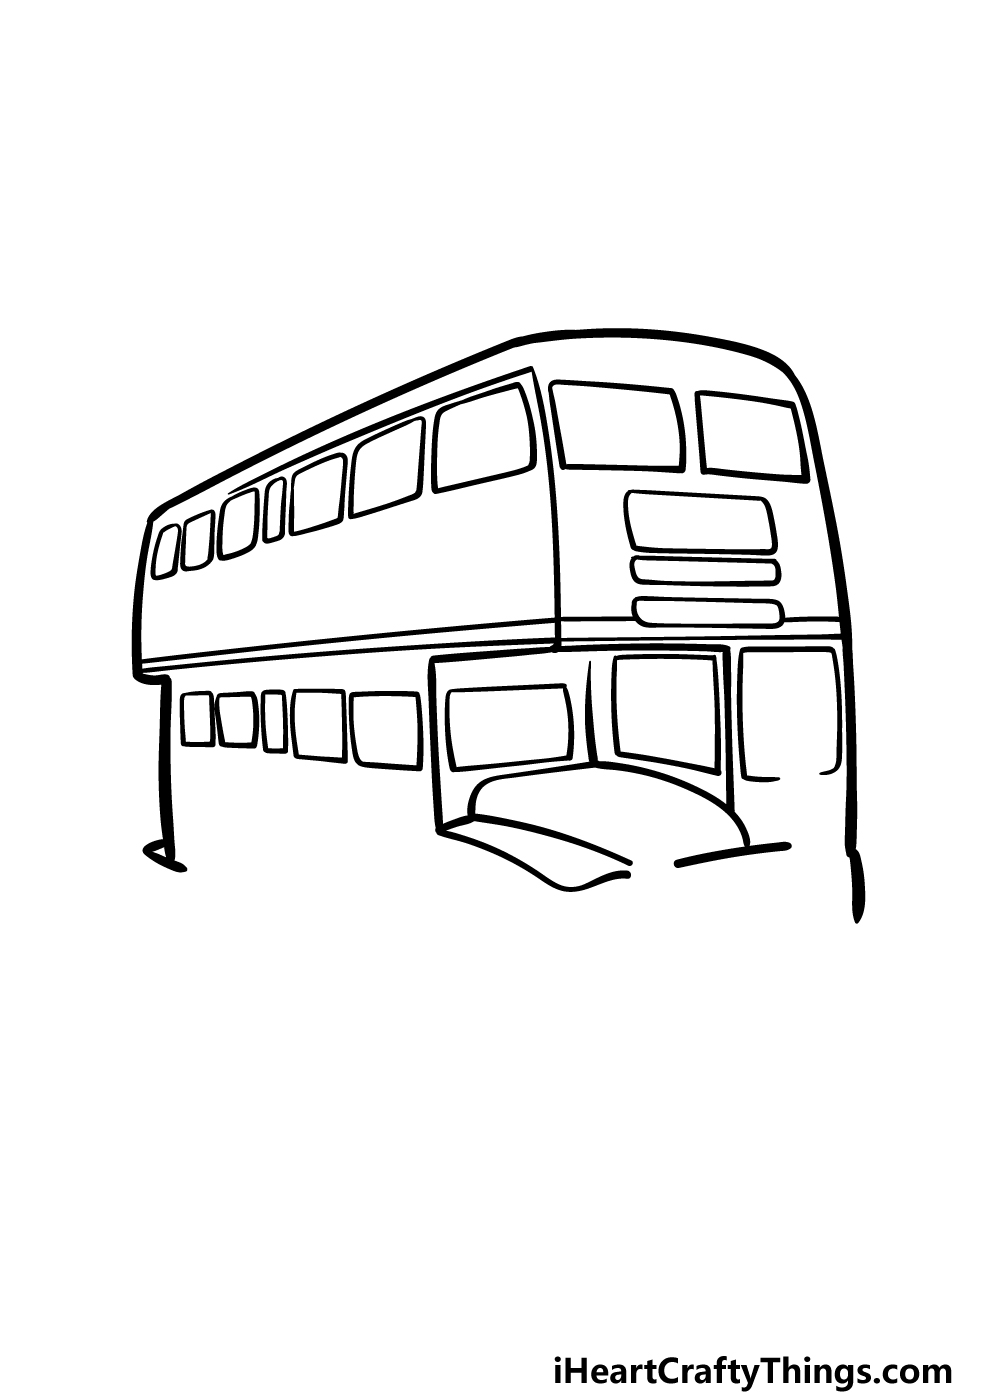
Now it's time to add some windows to the lower half of the bus.
These ones will look similar to the windows on the upper portions, but their sizes and positioning will be slightly different, as seen in the reference picture.
There will also be windows added to the squared, indented section near the front. Once these windows are added, it will be time for some final details and elements in the next step of the guide.
Step 6 – Now, finish off the final details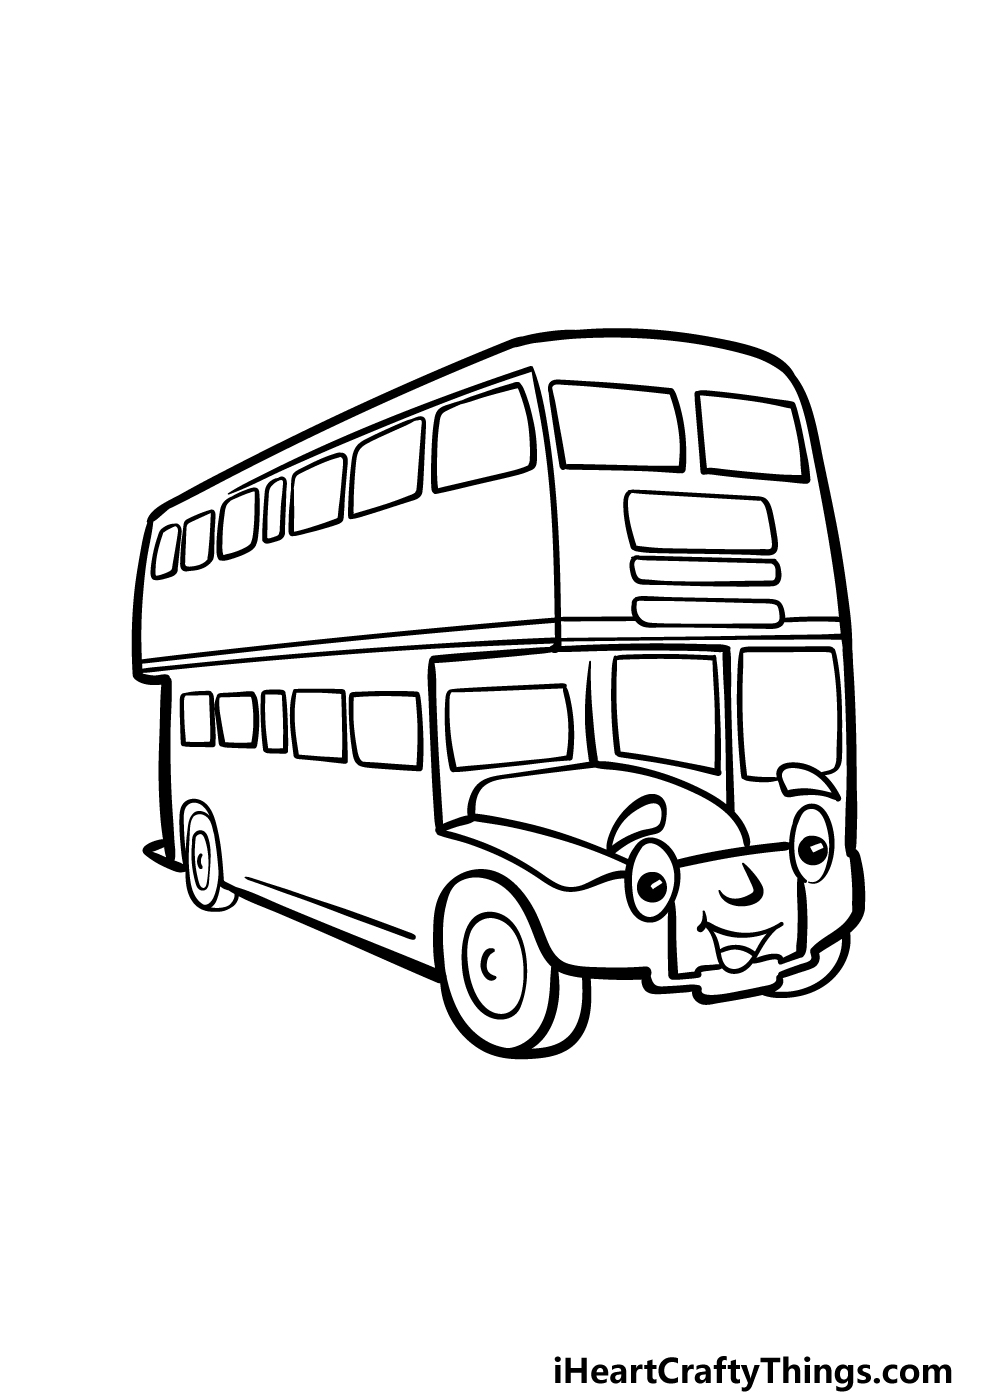
We will be adding quite a lot to your cartoon bus drawing in this next step, so let's take it slowly!
First, add the base of the bus using your ruler, but be sure to leave some rounded openings for the wheels of the bus.
As for the wheels, these will be drawn as some rounded shapes with round portions within. With these final elements done, we will finish off this bus with some fun facial details!
You can draw some round eyes with eyebrows above near the front, and then give it a smiling mouth below an angular nose.
Then, this cartoon bus is complete! Before moving on, be sure to add any extra details or ideas you have to personalize it even further. Will you add a background for this fun bus?
Step 7 – Finish off your cartoon bus drawing with some color
This final step of our guide on how to draw a cartoon bus will focus on bringing it to life with some color! In our reference image, we went with a classic red color for most of the vehicle.
Then, we created some fun contrast with a yellow stripe between the two sections.
Do you think you will use a similar color scheme for your own cartoon bus? You could also go for completely unique colors instead, so it's completely up to you!
Your Cartoon Bus Drawing is Complete!
You have finished all 7 steps of this guide on how to draw a cartoon bus, and what a fun drawing you have at the end of it. If only all buses looked this fun and friendly!
Now that you have finished the design, remember that you can add even more of your own personality to the scene by adding details or even a fun background.
This is your chance to show off your creativity, so be sure to have fun with it and see what happens!
This is not the end of the fun we have in store for you, too! We have many more awesome drawing guides and other activities on our website, so remember to check in often to never miss out.
You can show off how well your cartoon bus drawing came out by sharing it on our Facebook and Pinterest pages! We really can't wait to see it.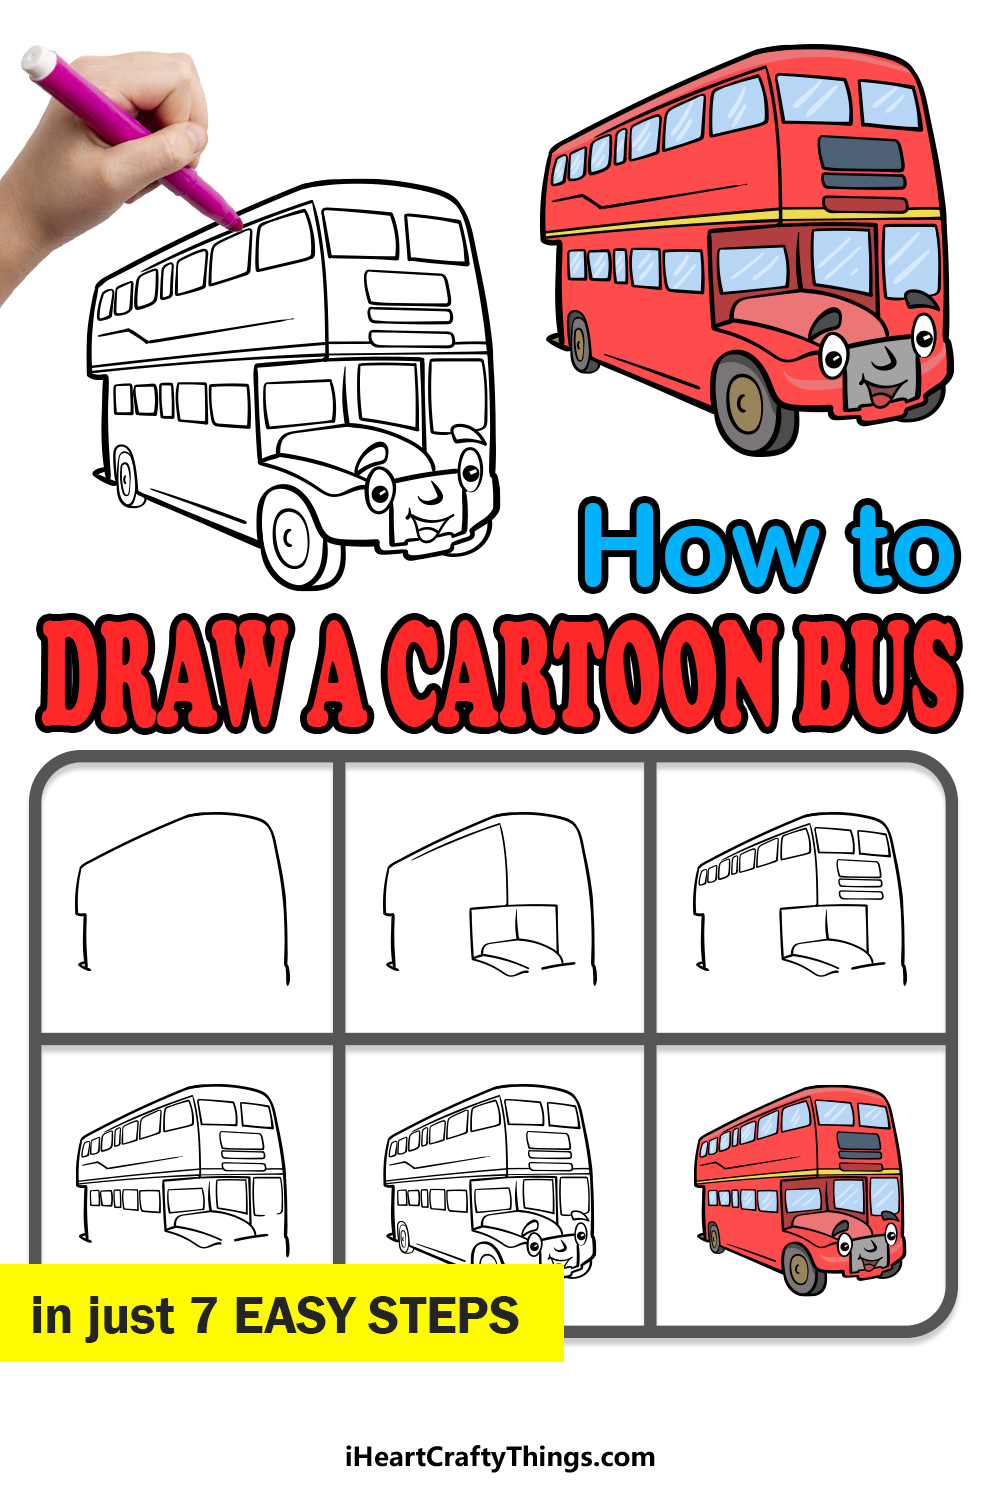
Source: https://iheartcraftythings.com/cartoon-bus-drawing.html
0 Response to "Cartoon Bus Easy Steps to Draw Cartoon Bus"
Post a Comment